

The Ultimate HVAC Electrical Troubleshooting Guide: Solving Common System Problems (DIY Edition)
Is there anything worse than the AC dying on the hottest day of the year? Yes—the bill you get for fixing it.
Most homeowners panic when their system stops, assuming the worst. They imagine a $5,000 compressor failure or a total system replacement. But here is the secret the industry doesn't always tell you: The majority of HVAC failures are simple electrical issues.
If you have a screwdriver, a multimeter, and a healthy respect for safety, you can often fix these common HVAC problems yourself for under $50, rather than paying a technician $500 just to walk through the door.
Want to stop guessing and start fixing?
This guide covers the basics, but if you want to be fully prepared for any breakdown, check out my comprehensive DIY HVAC Course. For a limited time, it’s just $20. Think of it this way: You can pay $500 for a one-time repair, or $20 to learn how to maintain and fix your system forever.
But for now, let's get your air blowing again. Here is your ultimate HVAC electrical troubleshooting guide.
Phase 1: The "Don't Get Shocked" Safety Rules
Before we touch a single wire, we need to talk about safety. HVAC systems run on 240 volts—enough to seriously hurt you.
Kill the Power: Go to your breaker panel and flip the breaker for the "Furnace/Air Handler" and "AC/Condenser" to OFF. Then, go outside to the grey box near your AC unit (the disconnect box) and pull the plug/switch there too.
Verify It's Off: Never trust a label. Use a non-contact voltage stick or a multimeter to double-check that the power is truly dead.
Watch Your Hands: Even with power off, the capacitor (a battery-like component inside the unit) can hold a charge. We will cover how to handle this safely below.
Phase 2: The DIY Toolkit
You don't need a van full of tools for basic electrical troubleshooting. You just need these three:
Multimeter: You need one that can check Voltage and Microfarads (look for the symbol that looks like $-\mid(-$). This allows you to test capacitors.
Insulated Screwdriver: A standard 4-in-1 screwdriver with a rubber handle.
A Camera (Your Phone): Pro Tip: Before you disconnect any wire, take a picture of it. This is your insurance policy so you know exactly where everything goes back.
Phase 3: The "Easy Wins" (Check These First)
Before you unscrew any panels, check the external factors. These simple issues mimic serious common HVAC problems.
1. The "Silent Switch" (Float Switch)
If your thermostat screen is blank or the system is totally dead, check your drain line.
The Issue: Modern units have a safety float switch installed in the drain pan. If your drain line clogs with algae, water backs up, lifts the switch, and kills the power to the AC to prevent water from ruining your ceiling.
The Fix: Find the drain line (PVC pipe) near your indoor unit. If the pan is full of water, vacuum it out with a Shop-Vac. The system should turn back on instantly.
2. The Breaker and Disconnect
The Issue: Sometimes a breaker trips due to a power surge or a particularly hot day straining the grid.
The Fix: Check your main electrical panel. If the breaker is in the middle (tripped) position, turn it fully OFF, then back ON. Warning: If it trips again immediately, STOP. You have a short circuit and need to look deeper.
3. The Thermostat Batteries
The Issue: It sounds obvious, but it happens constantly.
The Fix: Change the batteries. Also, pull the thermostat off the wall and ensure the tiny wires (Red, Yellow, Green, White) are screwed in tight.
Phase 4: Intermediate DIY Troubleshooting
If the easy checks didn't work, it's time to open the outdoor unit. This is where you find the two most common culprits of HVAC troubleshooting: The Capacitor and The Contactor.
1. The Capacitor (The #1 Failure)
The capacitor acts like a giant battery that gives your compressor the "jolt" it needs to start. When these fail, the fan might spin slowly, or you might hear a loud hummm-click noise from the outdoor unit.
The Visual Test: Look at the silver cylinder inside the panel. Is the top flat like a soda can, or is it domed/puffy? If it’s puffy, it’s bad.
The Meter Test:
Safety Wait: With power OFF, wait at least 10 minutes before touching the capacitor. This gives the internal resistor (if present) time to dissipate the stored electrical charge.
Photo: Take a photo of the wires.
Disconnect: Remove the wires from the terminals.
Test: Set your meter to "MFD" or the microfarad symbol. Touch the probes to the terminals (C and HERM).
Result: Compare the number on your screen to the number on the sticker (e.g., 35uf). If your meter reads zero or is significantly lower than the sticker, you need a new capacitor.
2. The Contactor (The Ant Trap)
The contactor is the switch that physically connects the power when the thermostat calls for cool.
The Issue: Bugs (ants and earwigs) are attracted to the electricity. They crawl into the contactor and get squashed between the metal plates, preventing the electricity from flowing.
The Fix: With power OFF, look closely at the contactor. If you see charred bugs or black soot on the contacts, you can sometimes clean it with specialized contact cleaner, but replacing it is usually the safer, long-term bet.
Phase 5: Loose Connections
Vibration is the enemy of electricity. Over years of running, the screws holding your wires can vibrate loose.
The Fix: With power OFF, gently tug on the wires connected to the capacitor and contactor. If a wire pulls out easily or looks burnt/melted, you have found your problem. Strip the wire back to clean copper and re-secure it.
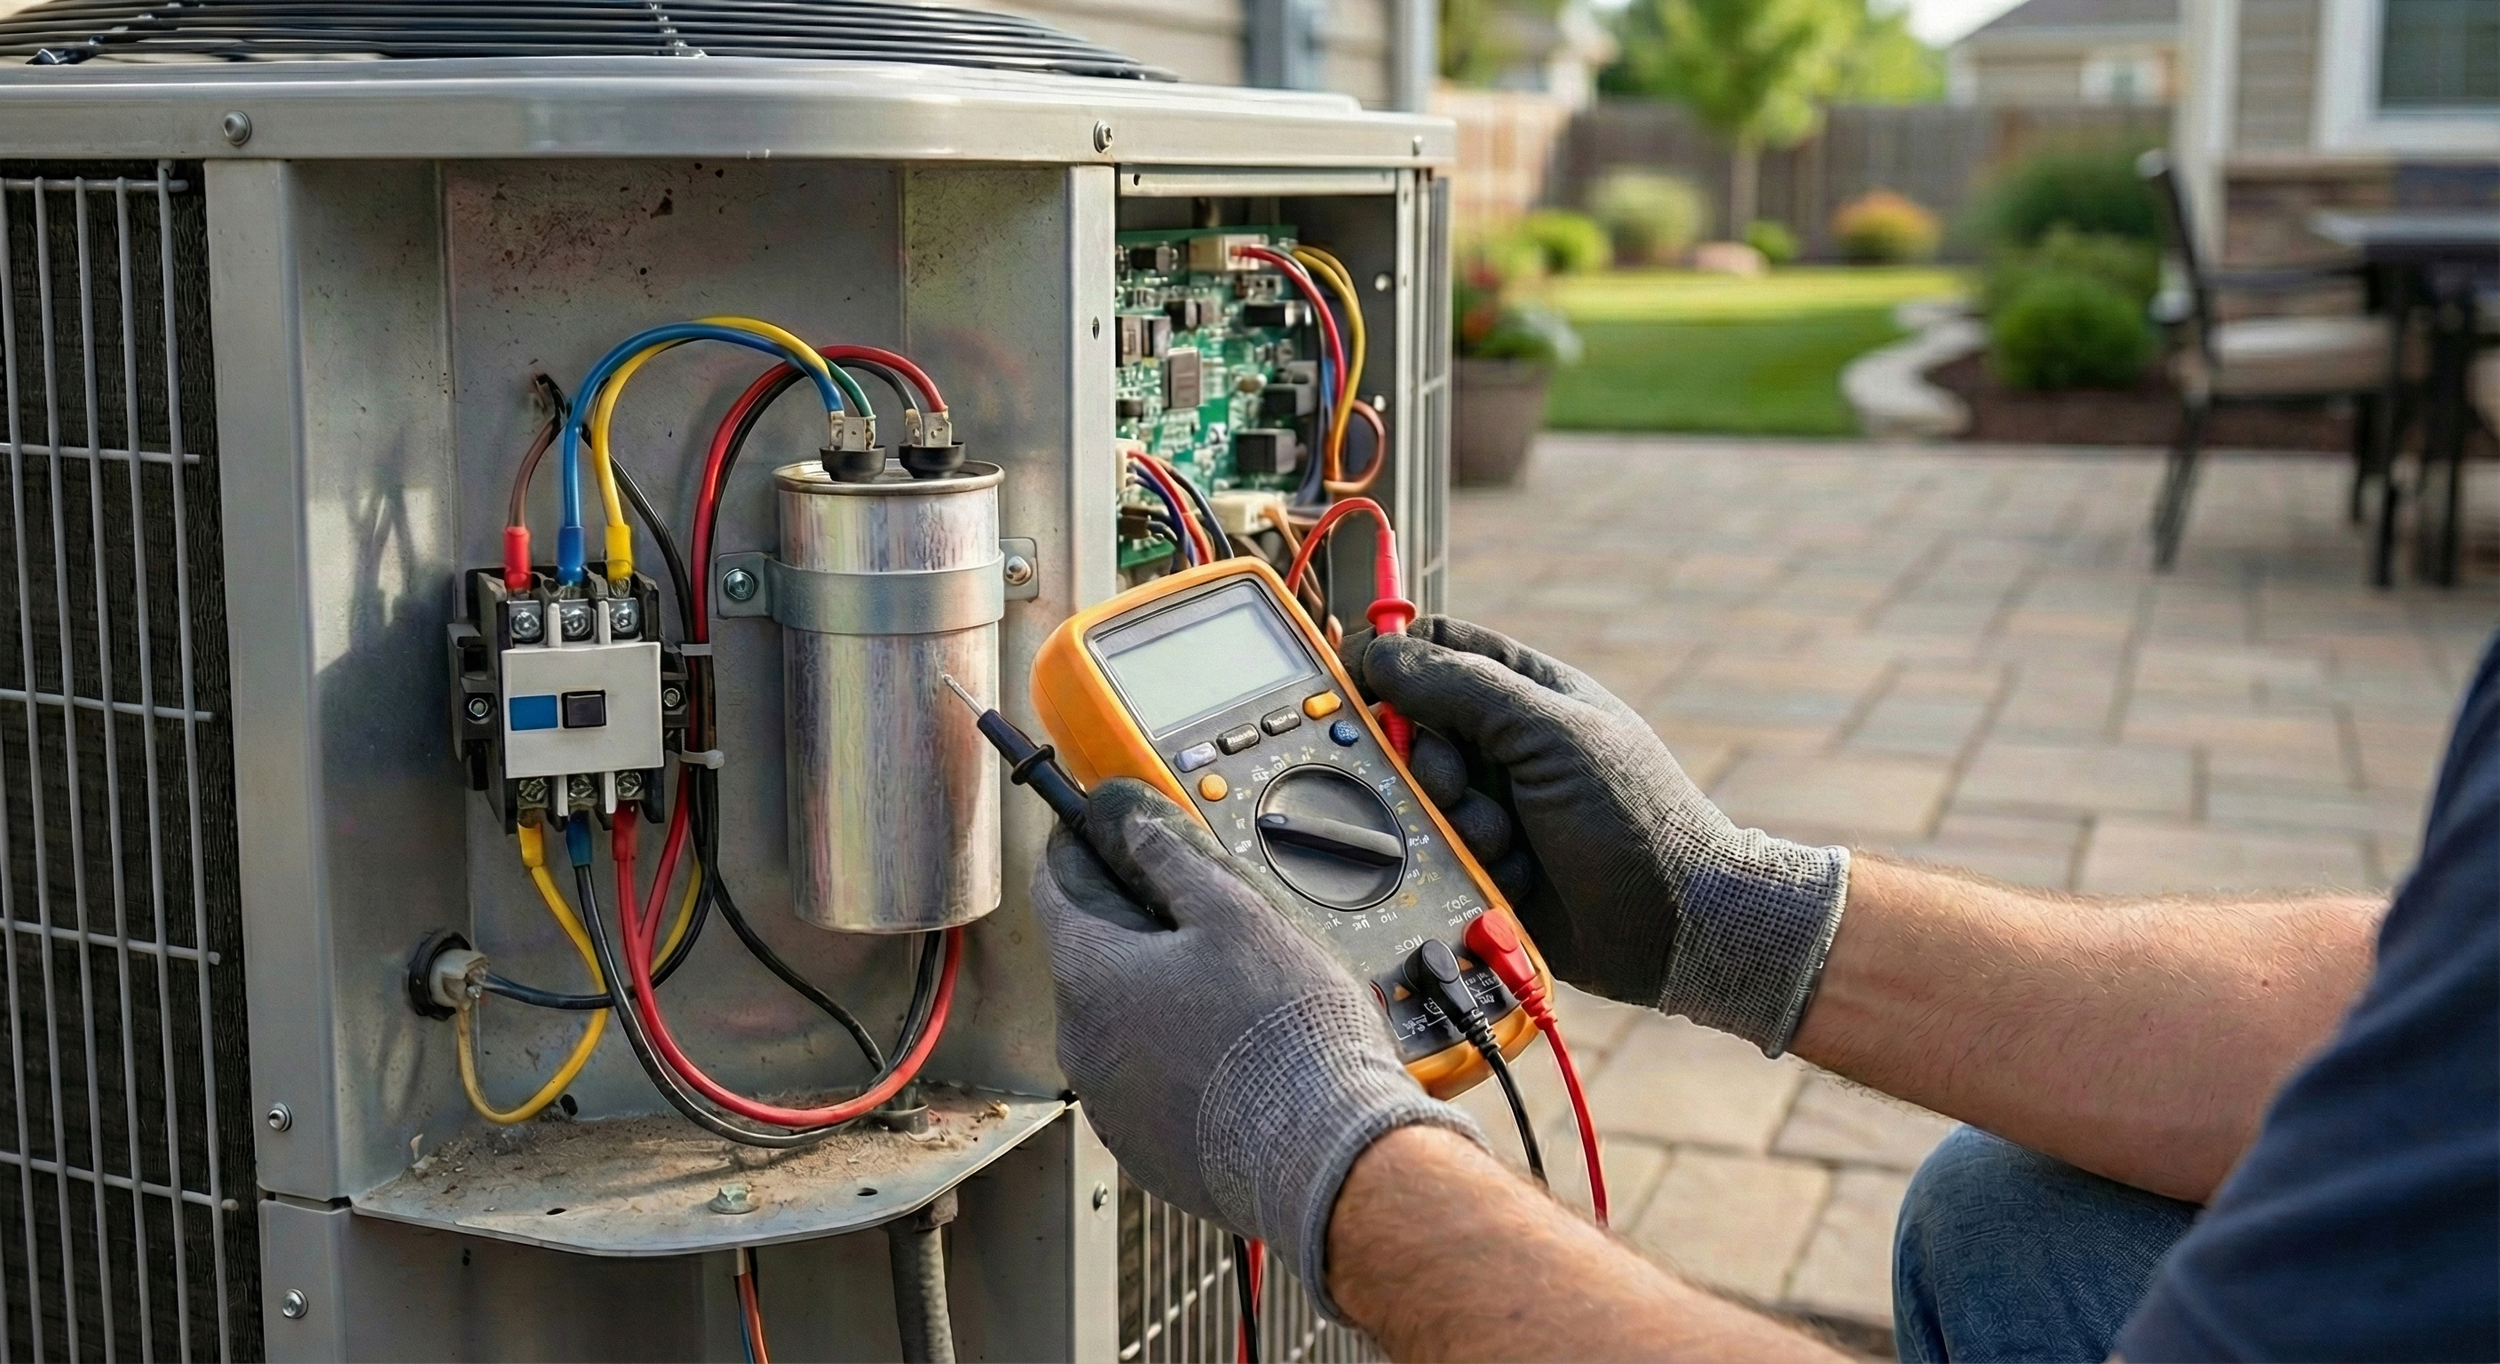
Hvac technician using multimeter to troubleshoot contactor and capacitor
When to Call a Pro
This HVAC troubleshooting guide is about empowering you, but also keeping you safe. You should call a professional if:
Burnt Wires: If the wires are melted all the way back into the motor.
Breaker Keeps Tripping: This means a major component (like the compressor) has a "hard short" and could cause a fire if you keep resetting it.
Ice: If the unit is frozen into a block of ice, this is usually an airflow or refrigerant issue, not an electrical one.
Conclusion: Become Your Own HVAC Hero
Fixing your own AC is one of the most satisfying feelings for a homeowner. By following this hvac troubleshooting guide, you can diagnose the issue, buy the part online for a fraction of the cost, and keep your home cool without breaking the bank.
Ready to Level Up?
If you found this guide helpful, you will love my full online course. It walks you through everything from maintenance to complex repairs. Stop fearing your HVAC system and start mastering it. [Click here to get the course for just $20].
Disclaimer: This guide is for informational purposes. Always follow local codes and safety regulations. If you are uncomfortable working with electricity, contact a professional.