

Troubleshooting an AC Unit: 5 Essential Electrical Steps for Outdoor Condensers
It is the hottest day of the year, the indoor blower is running, but the air coming out of your vents is lukewarm. You walk outside to check the condenser (the outdoor unit), and it is sitting there in dead silence—or worse, making a loud, angry hum.
While many homeowners immediately panic and call a tech, understanding the anatomy of your outdoor unit can save you time and money.
In previous guides, we’ve covered the advanced electrical troubleshooting mindset and how to trace hidden low-voltage shorts. However, this guide is different. We are zooming in exclusively on the "heart" of your system: the outdoor condenser.
This is your step-by-step guide to troubleshooting an AC unit by isolating the five most common electrical issues found in the backyard beast.
Safety First: The High Voltage Warning
Before opening any panels, remember that the outdoor condenser handles 240 volts of electricity—enough to be lethal. Always turn off the breaker at your main panel and pull the disconnect switch at the unit. For a full breakdown of safety protocols, review our Safety Guide to Residential HVAC Electrical Troubleshooting.
Step 1: The Disconnect Box (The Power Check)
When troubleshooting an AC unit, you always start at the source. If the outdoor unit is completely dead (no sound, no fan, no compressor), the electrical issue is often upstream.
Locate the Disconnect: This is the gray box mounted on the wall near your AC unit.
Inspect the Breakers/Fuses: Open the box (carefully). If your disconnect utilizes fuses, test them for continuity using your multimeter. A blown fuse often indicates a deeper amperage spike from the compressor.
Verify Voltage: With the disconnect engaged (and safety gear on), verify you have 240V coming into the line side of the contactor inside the unit. If you have 0V, your issue is back at the main breaker panel, not the AC unit itself.
Step 2: The Contactor (The Gatekeeper)
If power is reaching the unit but nothing is turning on, the contactor is your primary suspect. The contactor is a switch that "claps" shut when the thermostat calls for cooling, allowing high voltage to rush to the compressor and fan.
Common Electrical Issues Here:
Pitted Contacts: Over time, the high-voltage arcing causes carbon buildup (pitting) on the brass contacts. This can block the flow of electricity even if the contactor is pulled in.
The "Ant" Invasion: Surprisingly, bugs and earwigs love the magnetic frequency of contactors. They often crawl between the contacts, getting crushed when it closes, creating an organic insulator that stops power flow.
Coil Failure: If the thermostat is calling for cooling (Y wire energized) but the contactor isn't pulling in, the low-voltage magnetic coil may be burnt out.
Step 3: The Dual Run Capacitor (The Battery)
If your outside fan is spinning but the air feels warm, or if you hear a loud humming buzz without the fan moving, you are likely dealing with a capacitor failure. This is statistically the most common electrical issue in modern condensers.
The capacitor stores energy to give your compressor and fan motor the torque they need to start.
Visual Checks vs. Meter Checks:
Visual: Look for the top of the silver cylinder. It should be perfectly flat. If it is domed or bulging like a soda can left in the freezer, it has failed.
Meter Check: You cannot rely on looks alone. You must check the microfarads (MFD) with a multimeter capable of capacitance testing. A capacitor rated for 45/5 MFD that reads 35 MFD is weak and will eventually kill your compressor.
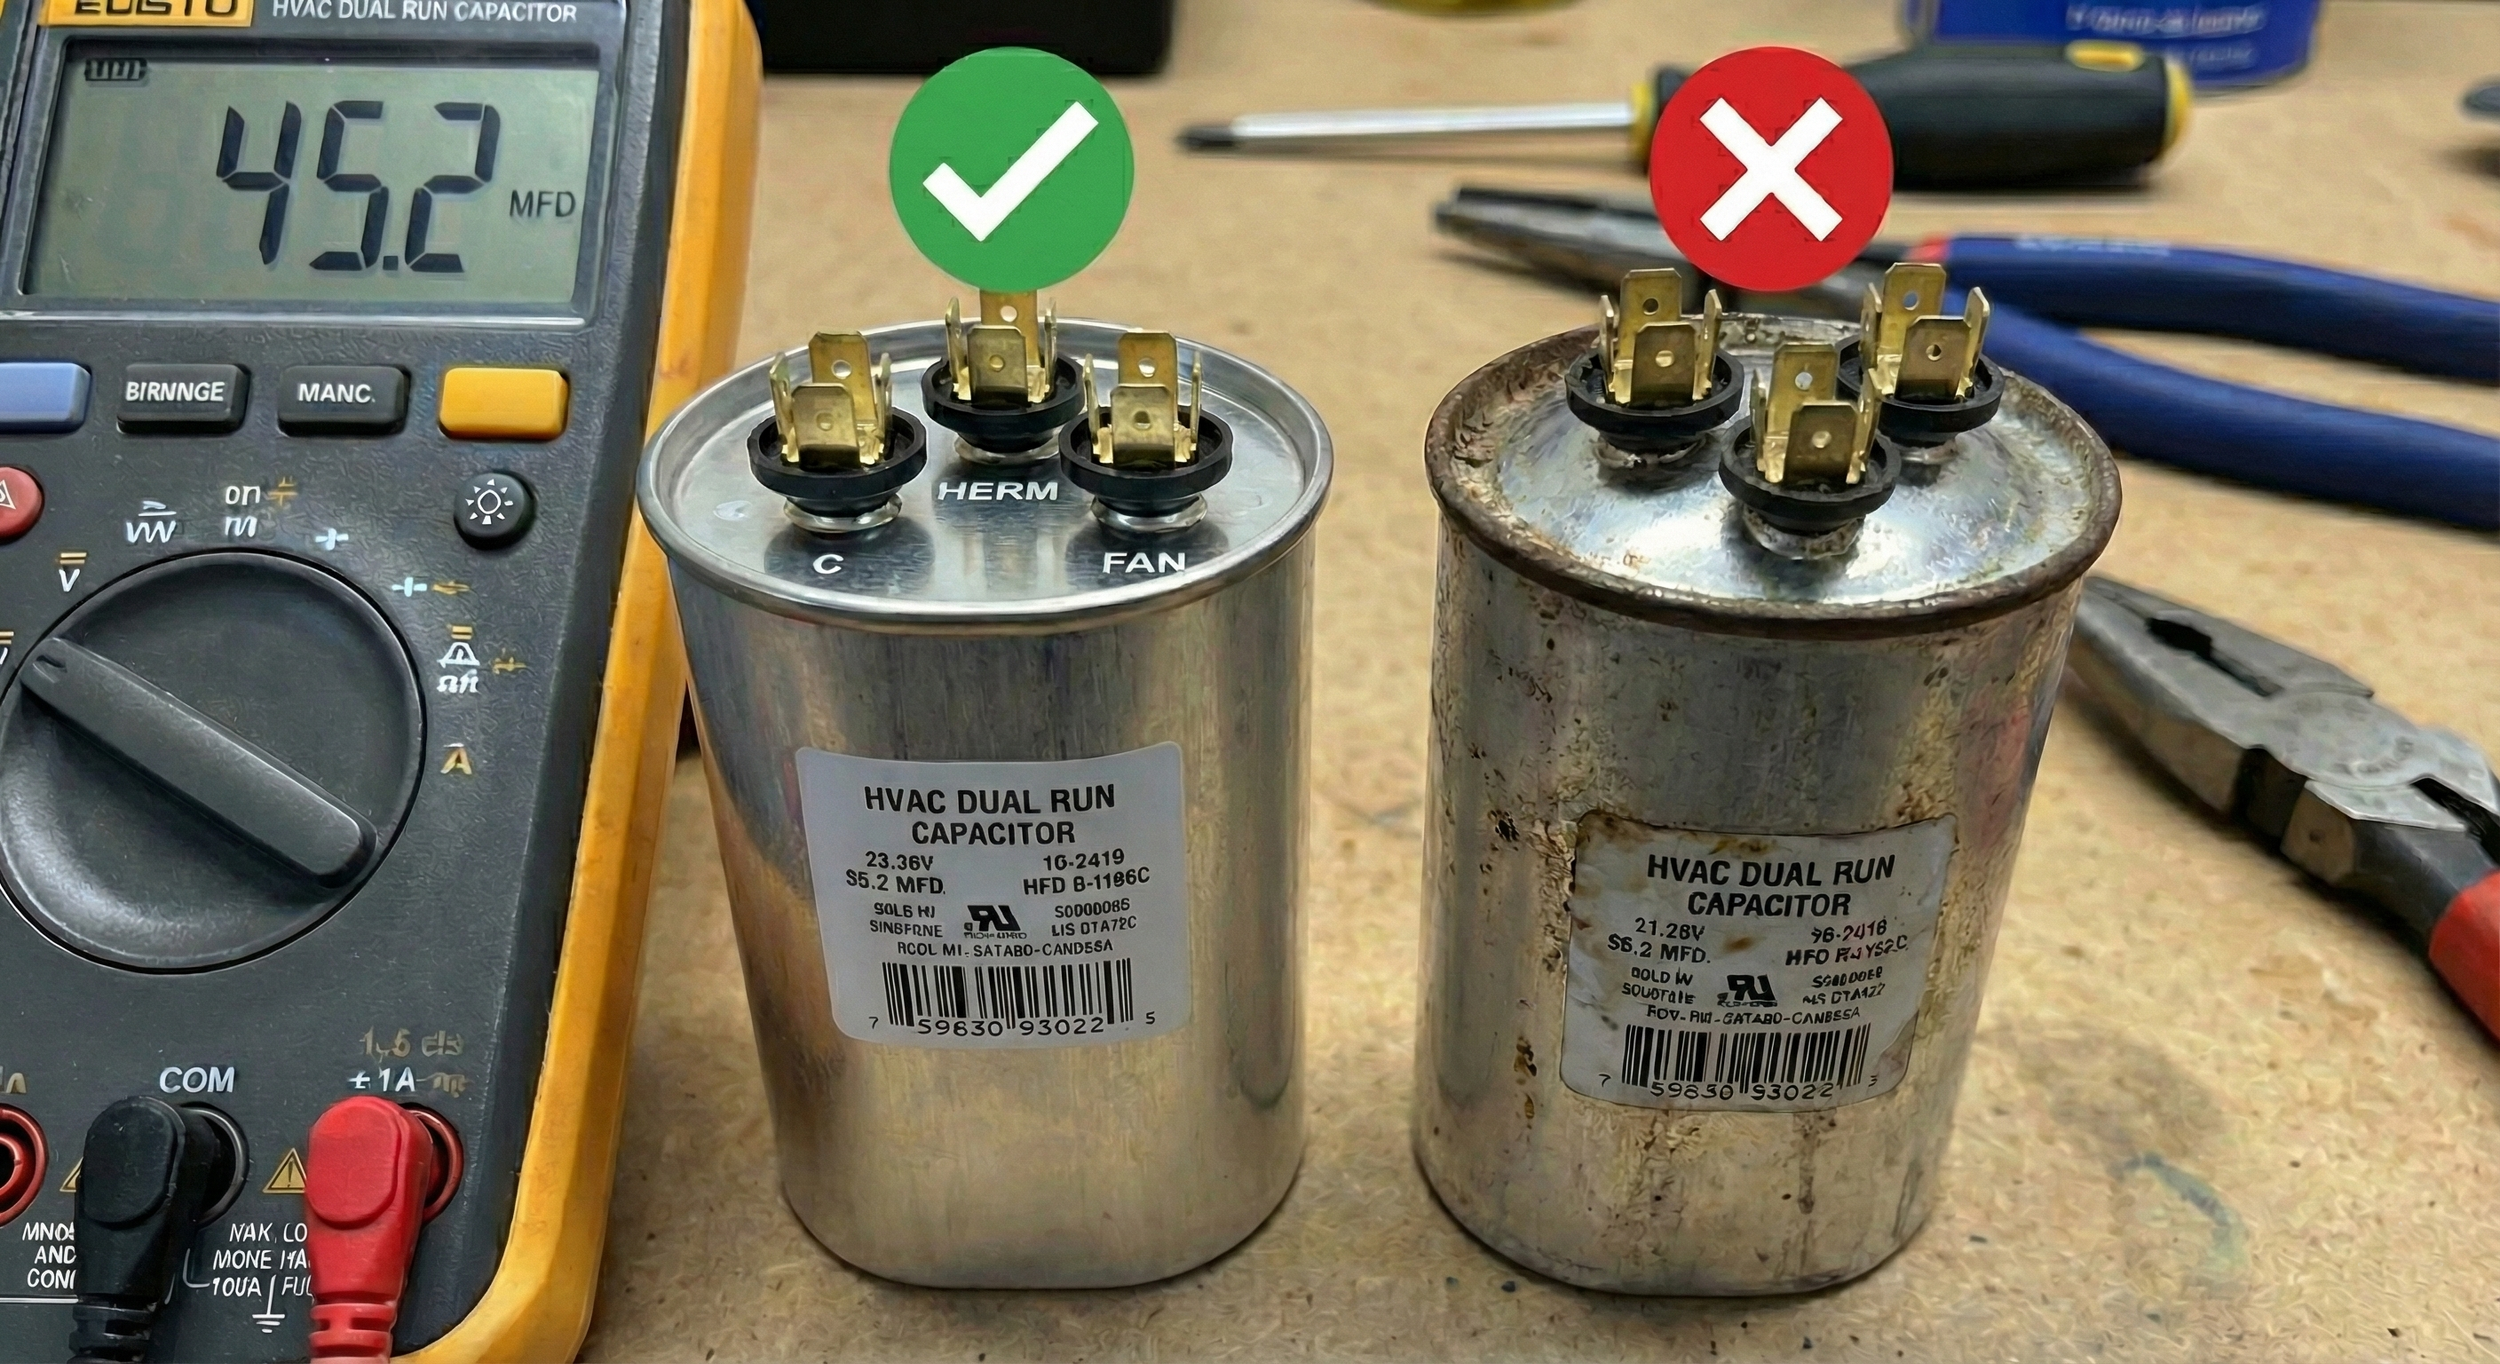
Visual troubleshooting comparison showing a good flat-topped HVAC capacitor alongside a failed condenser capacitor with a bulging top, a common electrical issue.
Step 4: The Compressor and Fan Windings
If the capacitor is good and the contactor is engaged, but the unit trips the breaker immediately or makes a horrific sound, you may have a grounded or shorted motor.
Troubleshooting an AC unit at the windings involves "Ohm-ing out" the compressor:
Test to Ground: With power off, measure resistance between the compressor terminals (C, S, R) and the copper copper tubing (ground). You should have "OL" (Infinite limit). If you get a resistance reading, the internal windings have touched the casing. This is a "grounded compressor" and requires a full unit replacement.
Fan Motor Check: If the fan blade is stiff and won't spin freely by hand, the bearings have seized. If it spins but won't start (and the capacitor is new), the electrical windings inside the motor have likely burned open.
Step 5: The Low Voltage Signal (The Command)
Sometimes, the electrical issue isn't high voltage at all. If the outdoor unit sits silent and the contactor is not pulled in, verify the signal from the house.
Check for 24V AC across the yellow and common wires at the contactor coil.
If you do not have 24V, the issue is likely a safety switch (like a float switch in your attic) cutting power before it reaches the outside, or a severed thermostat wire chewed by a weed whacker.
Summary: Is It Time to Call the Reaper?
Troubleshooting an AC unit requires patience and a systematic approach. By checking the Disconnect, Contactor, Capacitor, Windings, and Low Voltage signals, you can diagnose 90% of outdoor failures.
However, if you identify a grounded compressor or burnt wiring that looks beyond a simple DIY fix, do not risk a fire hazard.
Want to learn how to fix these issues yourself? Check out the HVAC Reaper Online Course, where we go from theory to practice, teaching homeowners and aspiring techs how to safely maintain and repair their cooling systems.